
Pay-a-Person

At Allegacy, your security is our top priority. That’s why we’re making an important change to how you send money.
Pay-a-Person(P2P) is a free digital service available to members through online banking and mobile banking that provides an easy, seamless experience to help members quickly move their money. It replaces the need for cash, downloading a separate payment app, and check writing when paying a person.
Step-By-Step Instructions
Pay-a-Person is designed for payments made to individuals. The Sender of the payment must be a member of Allegacy. However, the Recipient of the payment can be anyone in the United States with a deposit account at a financial institution or a debit card that accepts a credit push. You should never send someone you do not know a P2P payment.
Here are a few instructions with screenshots:
To Access Pay-a-Person in Online Banking:
1. Select Pay-a-Person from the Move Money menu
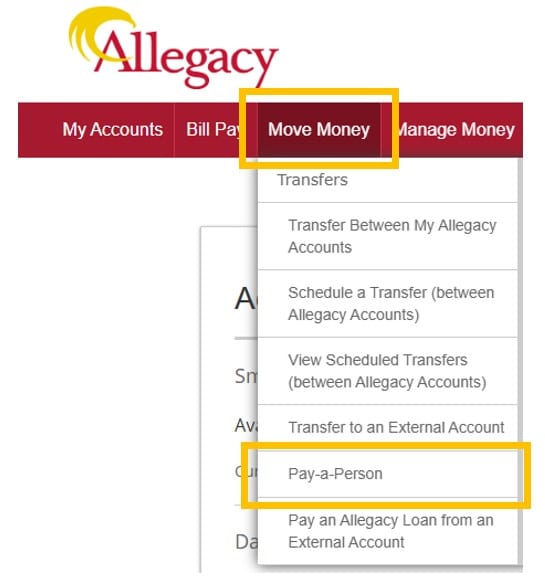
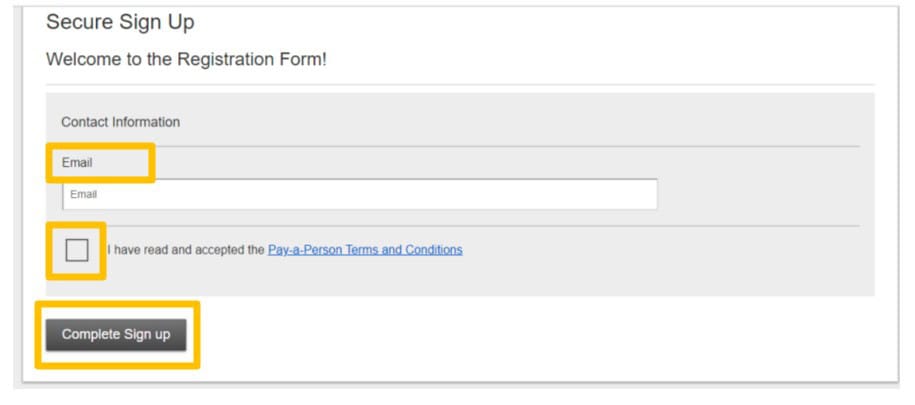
2. Upon initial login, you will need to complete the registration form and accept the Terms and Conditions.
To Access Pay-a-Person in Mobile Banking:
1. Select “Pay-a-Person” from the More menu
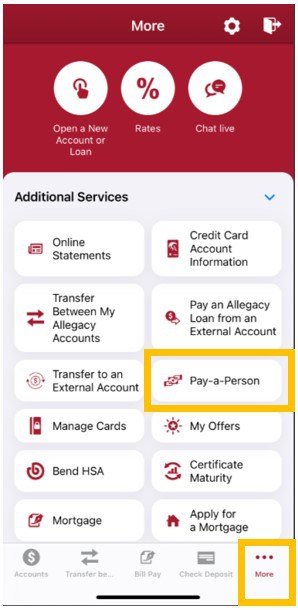
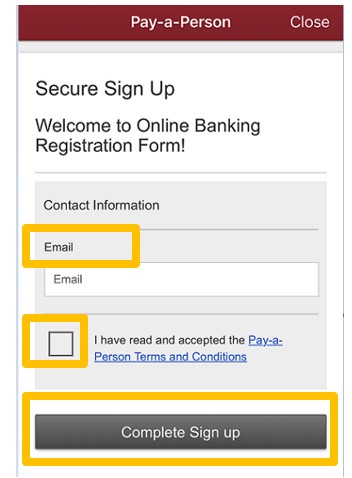
2. Upon initial login, you will need to complete the registration form and accept the Terms and Conditions.
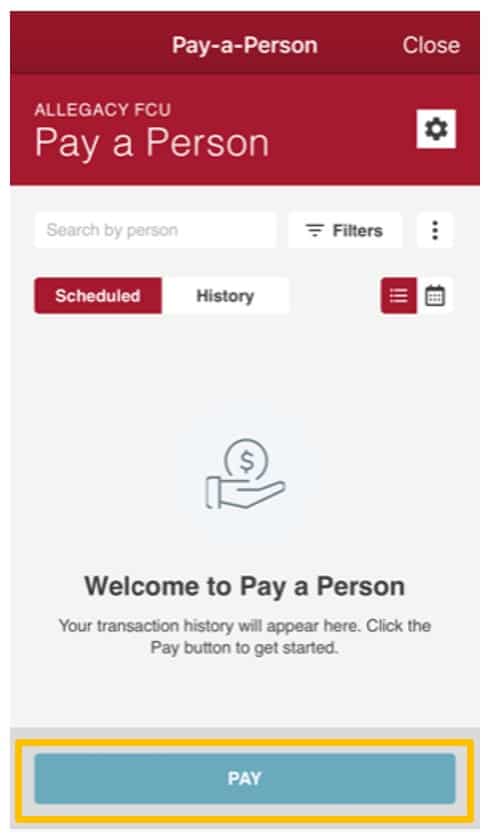
After completing the registration form, the Welcome Screen will display.
You can set up preferences by selecting “Continue to Settings” or select “Skip and do later” to begin adding contacts.

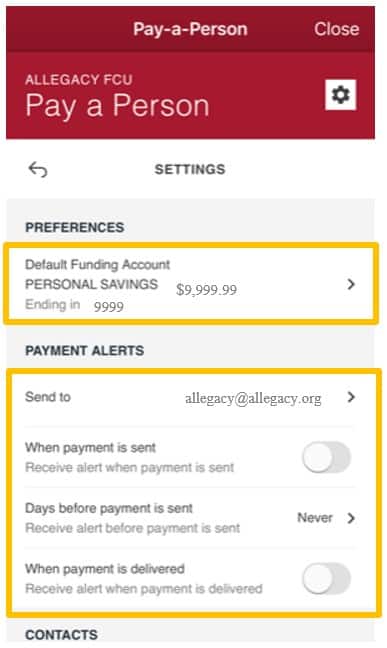
Select “Default Funding Account and Alert Preferences”
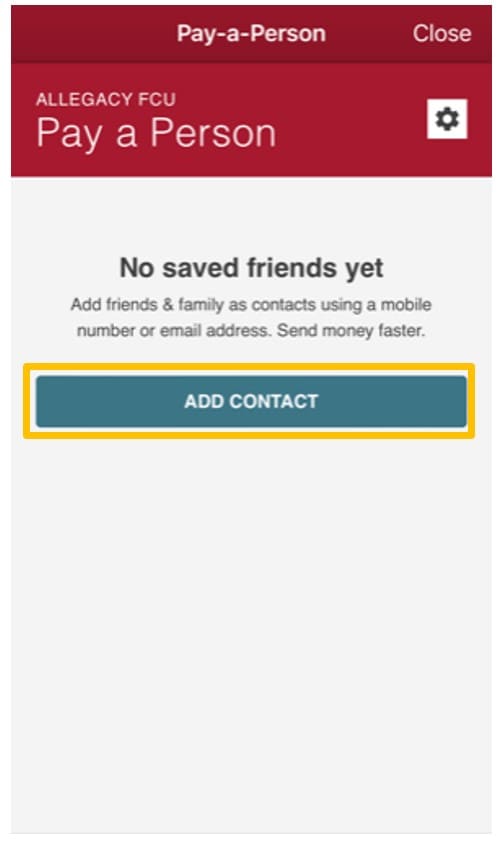
Adding a contact
Select Add Contact
Adding a Contact requires 2-Step Verification. The code will be sent to the member’s mobile number on file.
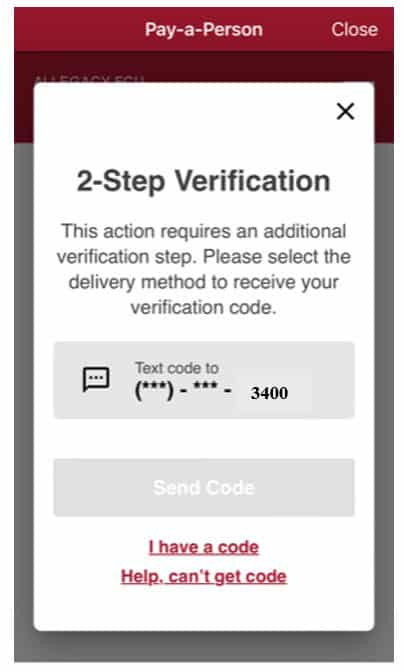
Select option to receive code, then select “Send Code”
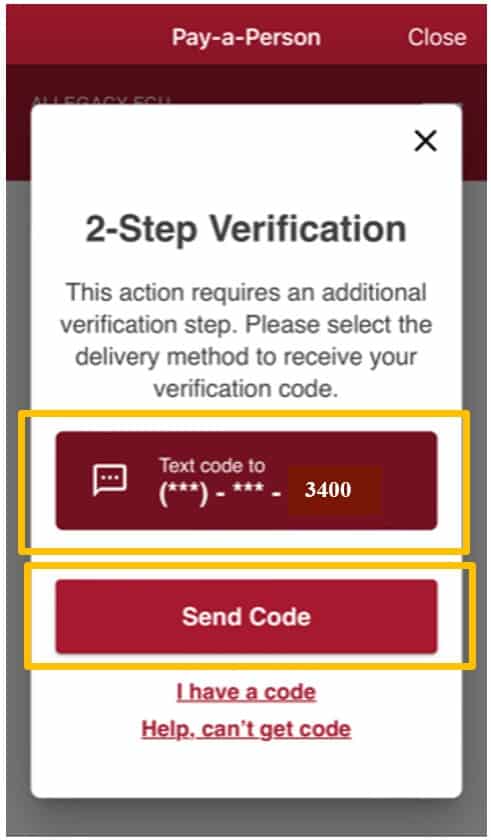
Code will be sent based on your preference
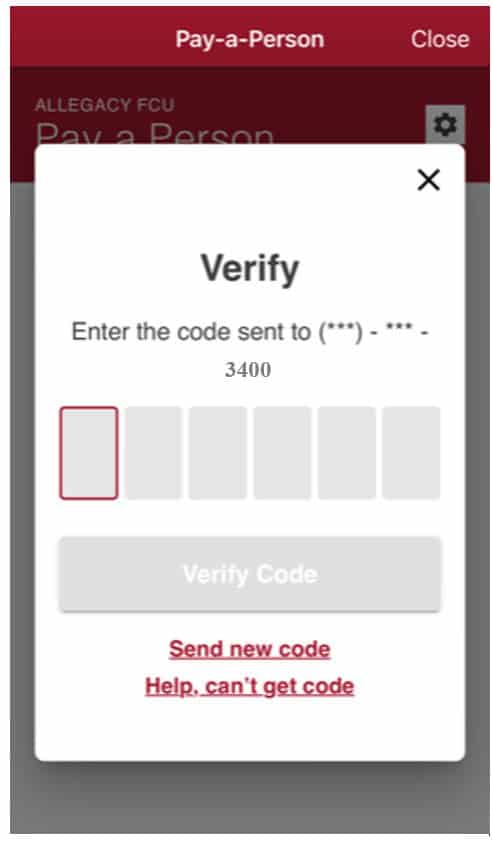
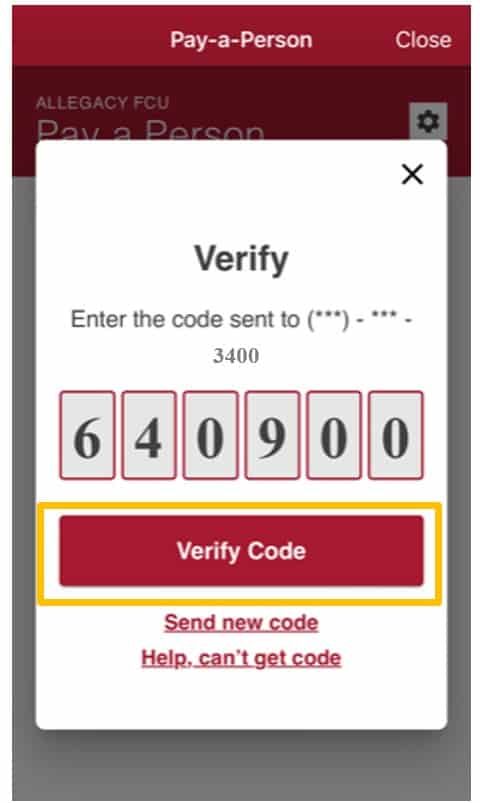
Enter the code. Select “Verify Code”.
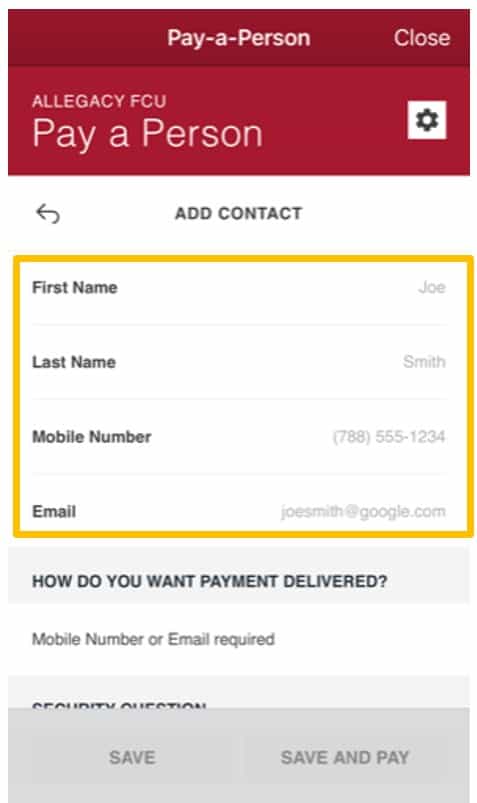
The Add Contact Screen will then display.
Input contact information for the person you want to pay – Name, mobile number or email address (only one is required)
Select how the Contact will receive the
payment notification – by SMS or email
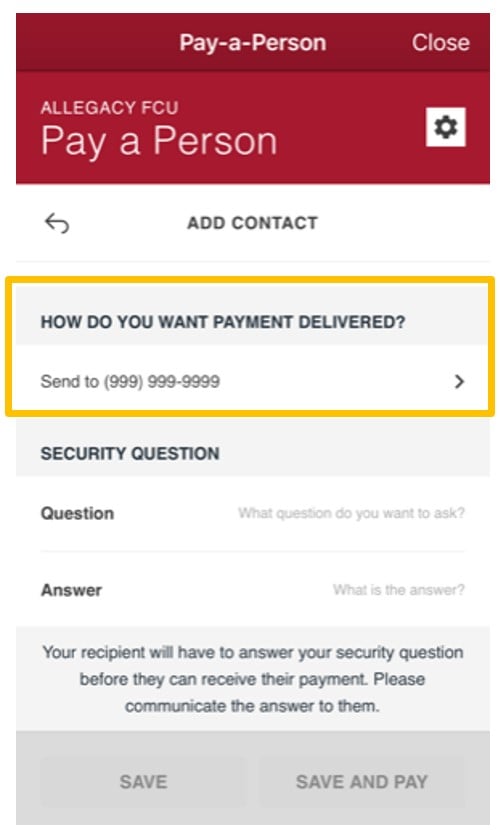
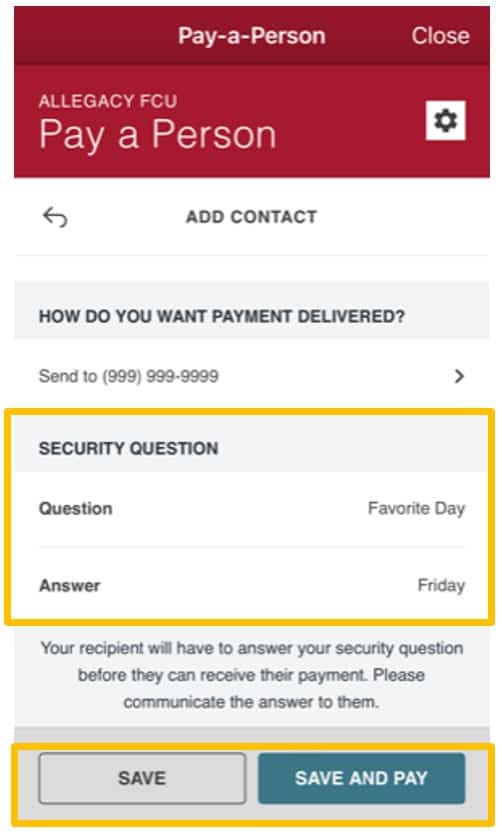
Input security question and answer; the contact
must answer this question correctly to receive funds;
select “Save” or “Save and Pay”
Sending a Payment
To Pay-a-Person, Select Pay on the Welcome Screen.
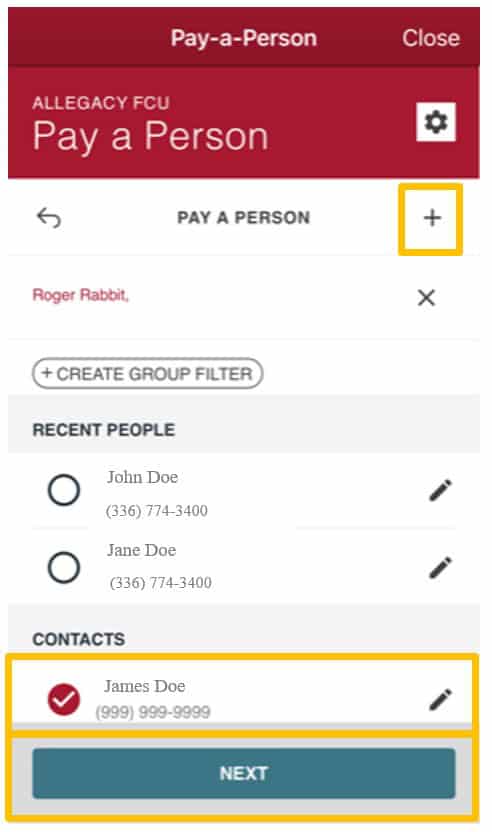
Select the Recipient or Add a contact by selecting
the plus icon “+” to the right of Pay A Person; Select Next
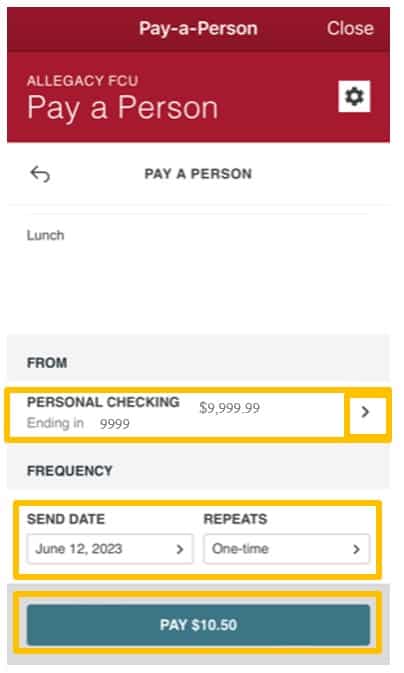
Input the Amount of the payment and a note if desired
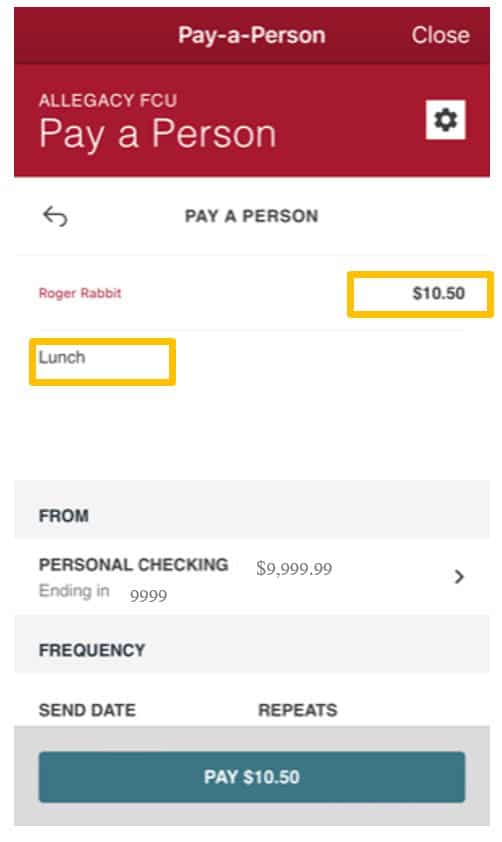
The From account will default to the account
selected in Settings; to change the account, select the
arrow to the right and select a different account; select
Send date and Frequency; Select Pay
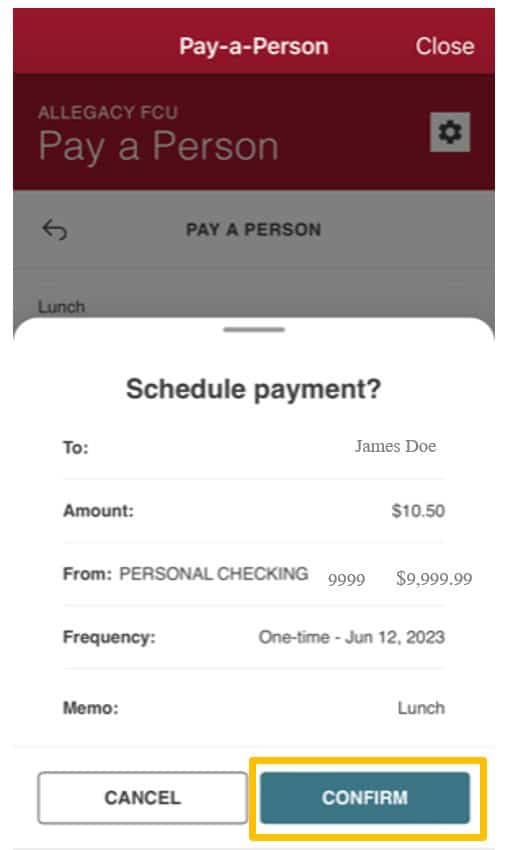
Select Confirm to Send the Payment;
Select Cancel to make corrections
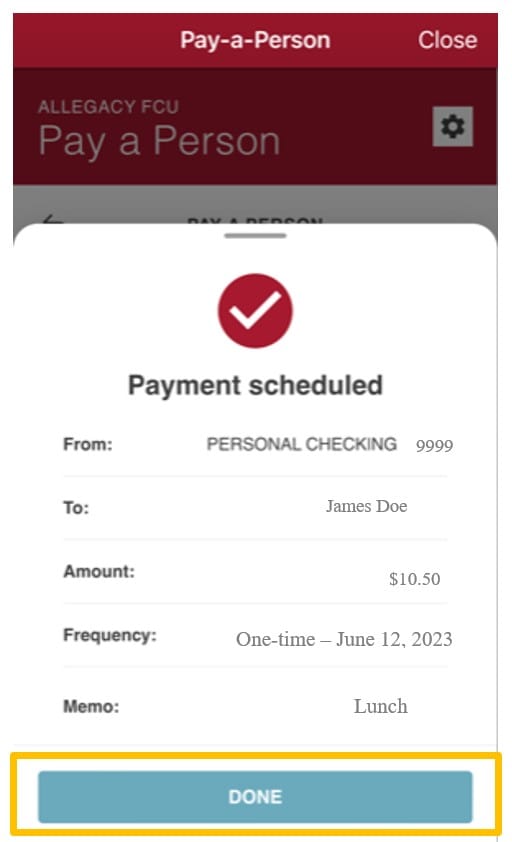
The Confirmation Screen will display; select Done
F.A.Qs
A Contact can be added using either a phone number or email address.
You can schedule payments at any time. Payments can be set up with the following frequency options: One-time, Weekly, Monthly, Quarterly, Annually, Every 2 weeks, Twice a Month, Every 6 Months
Per transaction $750, Daily $1,000, Weekly $2,000 Monthly $4,000
The Recipient will see the payment in their account the following business day after accepting the payment if they enter their account and routing numbers or in real-time if entering their debit card information or Allegacy account information.
Yes. A $1 fee applies for only real-time debit card transactions.
A contact can receive their funds the next business day by entering their account and routing information. There is no fee with this payment option.
Both the Sender and Recipient will be notified when the payment is sent and when it has been delivered. Notifications are sent to the sender when a contact or payment is created, changed or updated. You may also opt into Alerts for additional information delivery.
If after seven (7) days the recipient does not claim the funds, the transaction is canceled. At that point, the sender’s account is never debited.
Yes, if the Recipient does not claim their payment from the Sender, the payment will be canceled, and the Sender will need to set up the payment again. Both the Sender and Recipient are notified when the payment link has expired.
For electronic payments processed via ACH, you can cancel a payment up until the payment cutoff time on the day the payment is scheduled to send. For Real Time debit card transactions, the transfer cannot be canceled.
A security question and answer are established for the Recipient by the Sender when adding the Contact. The question and answer are secret between the two parties and the Sender must share the information before sending the payment. The security question will be used each time by the Recipient for any changes they need to make to their payment instructions.